How to Build a $1,000 Emergency Fund When You Live Paycheck to Paycheck
The "three to six months of expenses" advice is the wrong place to start. The research points to something more useful and a lot less crushing. Your first real milestone is $250, the dollar amount CFPB research links to measurably lower financial hardship. From there you climb to $1,000, which is where the short-term borrowing cycle starts to break, and then to $2,500, the buffer that lowers hardship for three full years according to the same CFPB data. At $20 a week, the path to $1,000 takes about 12 months. The trick is keeping it in a separate, FDIC-insured high-yield savings account so it actually stays put.
The standard advice goes like this: save three to six months of expenses. For someone earning $42,000 a year with rent at $1,400 a month, that is $4,200 to $8,400 sitting in an untouched account. Reading that when your checking balance is $73 is not motivating. It is discouraging. It makes you feel like emergency savings is something other people get to have.
So let us throw that number out for now. The research actually says something much more useful, and the first real milestone is way smaller than you think.
The CFPB ran a long study called Making Ends Meet and found that even a $250 cushion measurably reduces financial hardship. Households that accumulate $2,500 see meaningfully lower hardship rates for the next three years. Not three months. Three years. That is not the six-month, eight-thousand-dollar fund the gurus talk about. That is a number most working people can actually build toward.
Here is how to get from where you are now to your first $1,000, with realistic milestones along the way and an honest section at the end about when borrowing $500 to $5,000 might still be the smarter move during the build.
The $400 Question
You have probably seen this stat floating around: a chunk of US adults cannot cover a $400 emergency expense in cash. The exact number from the Federal Reserve's 2024 SHED report (released May 2025) is 37%. That number has barely moved in three years. It is not improving with the economy. It is not improving with raises. It is stuck because most people are running their finances without a buffer, period.
The $400 figure is not random. It is the size of the everyday emergency: a car repair, an ER copay, a vet bill, the deductible on a renter's claim. If you can absorb $400 in cash, you do not have to put it on a credit card you cannot pay off, you do not have to take out a short-term loan, and you do not have to skip rent to cover it. That is the difference between a one-time hit and a six-month spiral.
So the first milestone is not $1,000. It is $250. And it is closer than it looks.
What the Research Actually Says
Three numbers worth knowing:
- $250: CFPB research shows this is the first dollar amount that measurably reduces hardship. Below this, you are exposed. Above it, you start absorbing small shocks.
- $1,000: This is where the short-term borrowing cycle starts to break. The Fed's data on borrower behavior consistently shows that households with around $1,000 in liquid savings are dramatically less likely to take out a small-dollar loan in the next year.
- $2,500: The CFPB sweet spot. Households that hit this number see lower hardship rates for the next three years. Not perfect protection, but a real, measurable cushion.
You do not need a perfect six-month fund. You need to clear $250 fast, get to $1,000 within a few months, and let $2,500 be the longer-term goal. Each milestone does a different job.
Milestone 1: $250 (The First Real Cushion)
If you start from zero, $250 is the milestone that proves to you that you can do this. It also covers a surprising number of "small disaster" expenses: a tire, a phone screen, a copay, a late fee you negotiate down.
Twelve-week starter plan for $250:
- Weeks 1 to 4: $20 per week ($80)
- Weeks 5 to 8: $25 per week ($100)
- Weeks 9 to 12: $17 per week ($70)
- Total: $250
Yes, those amounts are small. That is intentional. The goal in the first 12 weeks is not the dollar amount. It is the habit. People who try to start at $200 a month and fail at week three end up worse off than people who quietly stash $20 a week for six months.
If $20 a week feels impossible, try this: cut one specific recurring expense and redirect it. Not "cut everything." One thing. The streaming service you stopped using. The food delivery fee. The vending machine soda. Pick one, cancel or skip it, and have that dollar amount auto-transfer to your savings account the same day every week.
Milestone 2: $1,000 (Where the Borrowing Cycle Starts to Break)
From $250 to $1,000 is the harder stretch. You will hit it in roughly six to nine months if you stay consistent and bump your weekly contribution as you can. Here is the rough math:
- $20/week for 38 weeks = $760
- $30/week for 25 weeks = $750
- $50/week for 15 weeks = $750
Pick whatever pace matches your income. The point is not speed. It is not breaking the habit. A consistent $20 a week beats a heroic $200 month followed by three months of nothing.
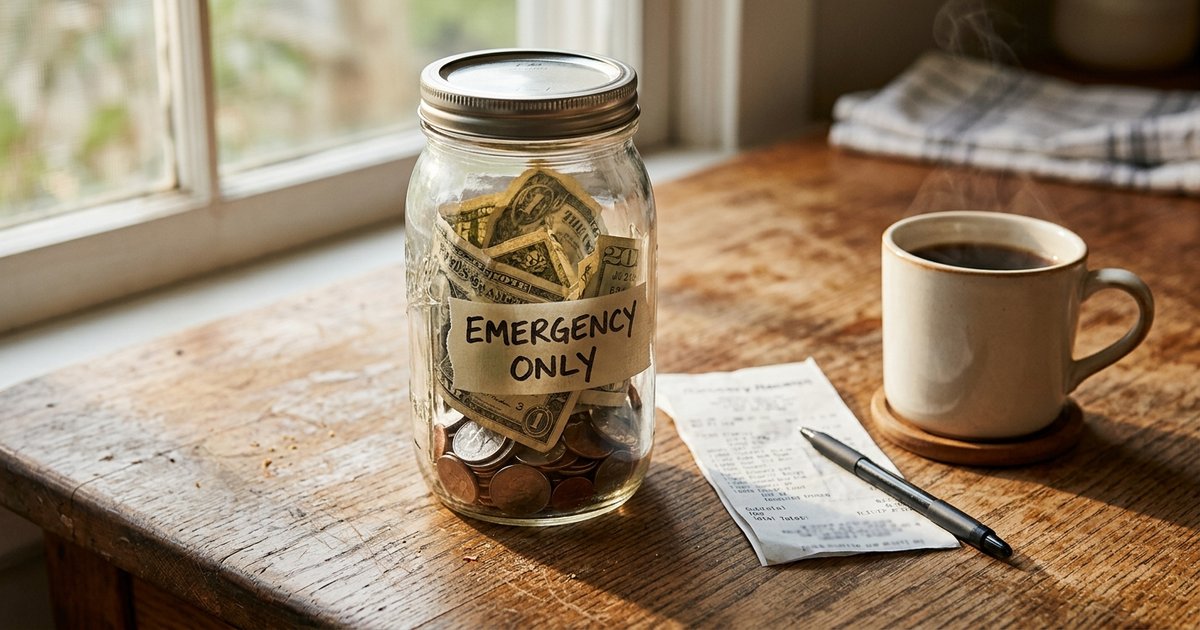
One thing that helps at this stage: name the account. Do not call it "Savings." Call it "Emergency Only" or "Don't Touch" or "Car Repair Fund." Brains respond to labels. An account named "Emergency Only" gets touched less than an account named "Savings 2."
Milestone 3: $2,500 (The Research-Backed Sweet Spot)
Once you have cleared $1,000, the third milestone is $2,500. This is the CFPB-identified number where households see lower hardship for three years running. It is also where you stop needing to dip into the fund for routine surprises. A $400 car repair stops being a fund-killer. A $200 medical copay barely touches it.
At $1,000, you are cushioned. At $2,500, you are insulated. The behavior of money changes when you cross $2,500: you make calmer decisions, you stop reacting to every email from your bank, and you stop borrowing for things that are not actual emergencies.
The 12-Week Starter Plan (Dollar by Dollar)
If you want a single concrete plan to follow for the first three months, here it is:
- Week 1: Open a separate savings account (more on where below). Transfer $20.
- Week 2: Cancel or pause one recurring expense you do not use. Transfer $20 again.
- Week 3: Set up automatic transfer of $20 the day after your paycheck hits.
- Week 4: Check the account. You should have $80. That is already 32% of milestone one.
- Weeks 5 to 8: Bump auto-transfer to $25 if you can. If you cannot, stay at $20. You should have around $180 by the end of week 8.
- Weeks 9 to 12: Find one "found money" moment (tax refund, bonus shift, side hustle payment, birthday cash). Throw 50% of it at the account. You should clear $250 by week 12.
That is it. No tricks. No "side hustle to make $500 a month." Just a structured first three months that gets you to a real cushion.
Where to Keep It
The single biggest mistake people make: keeping their emergency fund in their main checking account. The fund gets used. Every time. It is not weak willpower. It is just how brains work around money you can see.
The right home for your emergency fund is a separate, FDIC-insured high-yield savings account (HYSA). FDIC insurance covers up to $250,000 per depositor, per bank, per ownership category, so your $1,000 is fully protected. High-yield accounts at FDIC-insured online banks have been paying roughly 4.0% to 4.5% APY in recent years (rates change, so check current rates when you open one). That means $1,000 earns you something like $40 a year just sitting there. Small, but free.
What to look for in a HYSA:
- FDIC-insured (or NCUA-insured if it is a credit union)
- No monthly maintenance fee
- No minimum balance to earn the advertised APY
- Fast transfers in and out (1 to 3 business days is standard)
- No tie to your debit card
If your credit history is rough, do not worry. HYSAs check ChexSystems, not your credit score. As long as you do not have unresolved account closures, you can typically open one. If ChexSystems is also a problem, look at BankOn-certified accounts and second-chance checking at credit unions. Our bank account setup guide covers second-chance options in detail.
One more option, if you are a W-2 employee: under the SECURE 2.0 Act, your employer may now offer a "Pension-Linked Emergency Savings Account" that auto-deducts up to $2,500 from your paycheck into a Roth-style emergency sidecar. Ask HR if it is available. See our employer help guide. Auto-deduction from a paycheck is one of the most reliable ways to save, period.
Three Automation Tactics That Work for Irregular Income
If your paycheck size varies, the standard "set up $50 auto-transfer every Friday" does not always work. Here are three approaches that survive variable income (we also have a full irregular-paycheck budget system built around this):
- Percent-based transfer. Some banks let you transfer a percentage of each deposit automatically. Set it to 5% or 10% of every deposit. A $400 week sends $20 to savings. A $1,200 week sends $60. Your savings rate scales with your income.
- Surplus sweep. Every Sunday night, look at your spending account. If you have more than X dollars (you decide, maybe $300), sweep the surplus into savings. Forces you to "harvest" the good weeks instead of spending them.
- Round-up rules. Many banks and apps will round every debit-card purchase to the next dollar and stash the change. A $4.65 coffee becomes a $5 charge plus $0.35 to savings. Painless, but slow. Combine with one of the above.
Pick one, not all three. Stacking automation rules is how people end up overdrawing their checking account chasing a savings goal. One simple rule, running consistently, beats three clever rules that fight each other.
When Borrowing $500 to $5,000 Is Smarter Than Draining Your Buffer
Here is the honest part nobody wants to write.
Let us say you have $800 saved (you have been working the plan for five months) and a $1,500 car repair lands on you. Your first instinct is to empty the fund and find $700 somewhere. Is that the right move?
Not always.
The buffer's whole job is to absorb hits without sending you back to zero. If you drain it to $0 to cover a $1,500 emergency, you have solved this week's problem and reopened the trapdoor for the next one. The next $400 surprise (and there is always a next one) puts you right back in payday-loan territory.
There is a specific scenario where a short-term installment loan in the $500 to $5,000 range can make more sense than draining the fund:
- The emergency is real and one-time (car, medical, urgent housing)
- You have stable income coming in to repay the loan on a fixed schedule
- The APR and terms are reasonable (always compare credit union PALs, lending-partner-network options, and bank personal loans before deciding)
- Borrowing lets you keep some of your buffer intact so you are not back to zero
In that case, you might borrow $1,000 (covering most of the repair), use $500 of your savings (keeping $300 in the fund), and rebuild from $300 instead of from $0. You pay interest on the borrowed portion, but you preserve the buffer that took five months to build.
This is not a recommendation to borrow. It is a recognition that sometimes a partial loan, with a partial drain, is the smarter math than wiping out a fund you have worked hard to build. Always run the actual numbers. A $1,000 loan at 30% APR over six months costs about $93 in interest. If your buffer earning 4% APY is worth around $40 a year to you in interest plus an unknown amount in "didn't have to borrow next time" value, the trade-off is sometimes worth it. Sometimes it is not.
The principle: emergency funds are built from income, not from loans. You never borrow to fund the buffer. But once the buffer exists, it is a real asset you can defend.
What Counts as a Real Emergency
Not every surprise is an emergency. This is the rule most people break and the reason most emergency funds get drained.
A real emergency:
- Was not predictable
- Is urgent (must be resolved in days, not months)
- Affects your housing, transportation, health, or income
Not an emergency:
- A holiday or birthday you knew was coming
- A car registration renewal (every year, same month, not a surprise)
- A vacation, even a "needed" one
- An impulse purchase you will regret
The annoying truth: most things you will be tempted to spend the fund on are not actually emergencies. They are sinking-fund expenses (predictable, recurring) that just feel emergency-shaped because you did not budget for them. Build a separate "irregular expenses" sinking fund for those over time. Do not pull from the emergency fund.
Frequently Asked Questions
For most people earning $30,000 to $60,000, six to twelve months is realistic. At $20 per week (about $87 per month), you hit $1,000 in roughly 12 months. At $40 per week, you get there in about six months. The first $250 should come in 10 to 14 weeks. Do not compare your timeline to someone earning twice what you do. Compare it to where you were six months ago.
Most personal finance research, including from the CFPB, suggests building a small starter buffer first ($250 to $500) before throwing everything at debt. Why? Because zero buffer means the next surprise goes right back on the credit card you were trying to pay off. Once you have $250 to $500 stashed, then aggressively pay down the highest-APR debt first. Once that is gone, build the buffer to $1,000 and beyond.
Not stupid, but not optimal. Cash is fine for $50 to $100 in a "true crisis, ATM is down" stash. Beyond that, an FDIC-insured high-yield savings account is safer (cash can be lost or stolen) and earns you 4% or so in interest. Cash also loses value to inflation over time. The HYSA is the better default for the bulk of your fund.
Yes. Savings accounts run a ChexSystems check (banking history), not a credit check. If your credit score is low but you have not had bank accounts closed for fraud or unpaid negative balances, you can typically open a HYSA. If ChexSystems is also flagging you, look at BankOn-certified accounts and credit union second-chance options, then graduate to a HYSA once the ChexSystems issue ages off.
A real emergency is unexpected, urgent, and tied to your housing, transportation, health, or income. Car broke down, you need it for work. ER visit with a copay. Furnace died in January. Things you knew were coming (birthdays, car registration, holidays) are not emergencies; they are sinking-fund expenses you should plan for separately. Drain the emergency fund only when you genuinely meet the definition.
Run the math both ways. Emptying the account fixes today and exposes you tomorrow. A partial loan ($700 to $1,000) plus a partial drain ($500 to $800) keeps some buffer intact. Compare the APR of the loan against the cost of being back at zero with no protection against the next surprise. For many people, preserving even $300 of the fund is worth a few months of loan payments. Always check credit union Payday Alternative Loans (PALs) first if you qualify, since they cap fees by federal rule and tend to be the cheapest small-dollar option.